It is the first setting most people change, and the one most often blamed for problems it cannot cause.
The Only Real Tradeoff
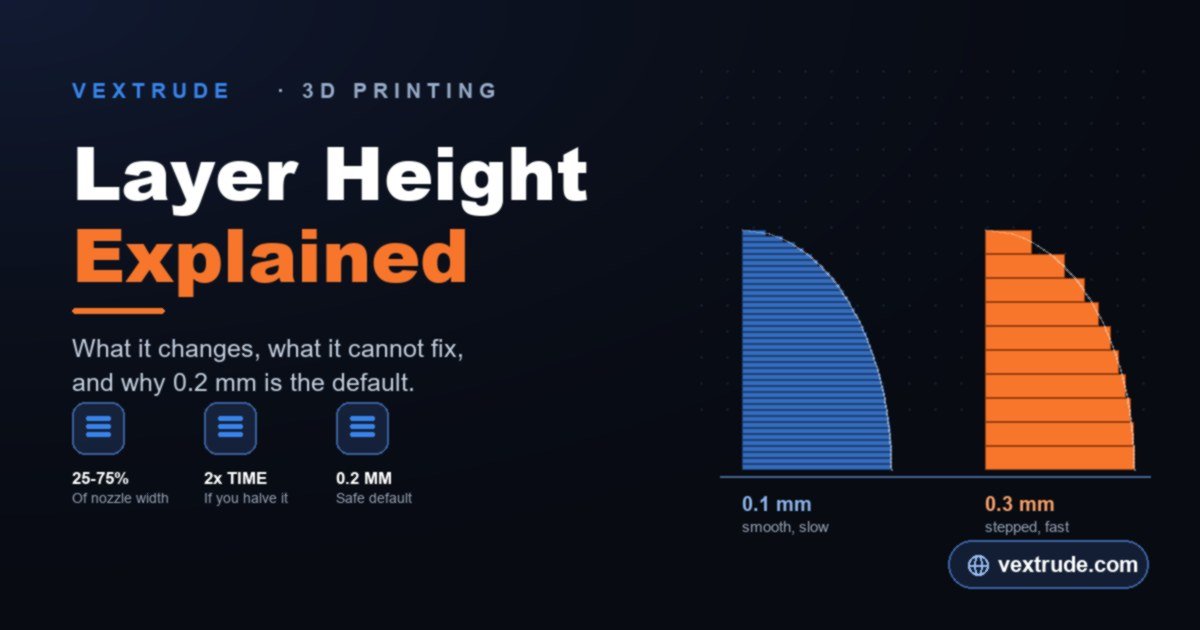
Layer height decides how many slices your model is cut into. A 40 mm tall part at 0.2 mm is 200 layers. The same part at 0.1 mm is 400 layers, and each one costs a full pass of the nozzle plus a Z move.
So the rule is blunt: halving layer height roughly doubles print time. Going from 0.2 mm to 0.1 mm turns a four-hour print into about eight. Going the other way, 0.3 mm gets you finished in roughly two-thirds the time.
Everything else in this article is about deciding when that trade is worth paying for.
Start From Your Nozzle
Layer height is limited by the nozzle you are printing through. The working range is about 25% to 75% of nozzle diameter.
Below 25%, the nozzle is dragging through material it cannot cleanly lay down, and you invite blobs and poor adhesion. Above 75%, the new layer cannot squash properly into the one beneath it, and the bond between layers gets weak.
For the 0.4 mm nozzle almost every printer ships with, that gives a usable range of roughly 0.1 mm to 0.3 mm, with 0.2 mm sitting in the middle. That is why 0.2 mm is the default nearly everywhere — not because it is optimal, but because it is the safe centre of the range.
Larger nozzles move the whole window. A 0.6 mm nozzle happily runs 0.15 mm to 0.45 mm, which is how people print big parts quickly without the layers looking coarse.
What It Actually Changes
Layer height changes the vertical resolution of your print. That means it visibly affects:
- Curved and sloped surfaces — the stair-stepping on a dome or a gentle ramp is layer height made visible. This is the single biggest improvement thinner layers buy you.
- Overhang quality — each layer overhangs the last by a smaller amount, so shallow overhangs come out cleaner.
- Fine vertical detail — lettering on a sloped face, or a thin horizontal lip, needs enough layers to exist at all.
And here is the part that surprises people: it does not improve detail in the X and Y directions at all. A logo engraved into the top face of a part is limited by nozzle diameter, not layer height. Printing it at 0.1 mm instead of 0.2 mm doubles your print time and changes that logo not at all.
Layer strength is also less sensitive than the internet suggests. Thicker layers often bond slightly better, because more hot plastic is deposited at once and the layer below stays warm longer. If you want a stronger part, orientation and perimeter count matter far more — see our guide on wall thickness and why prints break.
Settings by Job
With a 0.4 mm nozzle, these are sensible starting points rather than rules:
- 0.28 – 0.3 mm — draft prints, test fits, big chunky parts, anything where you only need to know whether the geometry is right. Fast, and the layer lines will be obvious.
- 0.2 mm — the default for good reason. Functional parts, brackets, enclosures, most things you print to use rather than to look at.
- 0.15 mm — a noticeable step up on curves for a moderate time cost. A good compromise for display pieces you still want finished today.
- 0.1 mm — miniatures, smooth organic shapes, anything with gentle domes. Expect to roughly double your print time versus 0.2 mm.
If a part has one important curved face and the rest is plain, consider rotating it so the curve prints vertically instead of dropping the layer height for the entire model. Orientation is free; layer height is not.
The Magic Numbers Myth
You will still find advice insisting layer height must be a multiple of some "magic number" — commonly 0.04 mm — because of how the Z motor steps.
The reasoning came from real hardware. A typical motor takes 200 full steps per revolution, and with an 8 mm lead screw that works out to 0.04 mm of travel per full step. If your printer could only move in full steps, any layer height that was not a multiple would accumulate rounding error.
Modern printers microstep. Drivers commonly run at 16 microsteps or finer, taking the practical Z resolution to 0.0025 mm or better. At that scale a 0.15 mm layer is not a rounding problem, and the effect on your print is nothing you could measure, let alone see.
Set the layer height your part needs. If you see banding at regular intervals, the cause is almost always a bent lead screw, a binding Z axis, or the gantry fighting the coupler — mechanical problems that changing the number will hide at best.
What It Cannot Fix
Reaching for a thinner layer height is a common reflex when a print disappoints. It is usually the wrong lever.
- Stringing and blobs — a temperature and retraction problem. Thinner layers mean more travel moves, so this often gets slightly worse.
- Weak, snapping parts — orientation and perimeter count. Thinner layers add more bonded interfaces, not more strength.
- Poor first layer adhesion — bed levelling and Z offset, unrelated to the layer height you print the rest at.
- Rough top surfaces — add top layers or slow down the top solid infill. Layer height barely touches this.
- Blurry engraved detail on flat faces — nozzle diameter. Fit a smaller nozzle or make the detail bigger.
The honest summary: layer height controls how smooth your curves and slopes look, and how long you wait. For nearly everything else, the setting you actually want is somewhere else in the slicer.
The quickest way to build intuition is to slice the same model twice and compare — the layer count and estimated time update immediately, so you can see exactly what a change costs before committing to it.
Related reading
- Wall Thickness and Why Prints Break
- What a Slicer Actually Does
- Online vs Desktop Slicer: When Each One Wins
See what a layer height costs
Slice the same model at two layer heights and compare layer count, time and filament before you print.
Open Print Control